At the time of its introduction, most of us were using 225mAH DEACs as our battery supplies. An escapement typically drew nearly 500 mA when activated (coil impedance typically in the 8-10 Ohm range). Elmic sought to reduce the current consumption by switching in a series resistor (around 10 Ohms) once the armature had pulled in. The theory was that it took less current to hold the armature in than to pull it in in the first place.
This worked quite well when the escapement was new. But as it became older and dirtier, the connection between the wiper and circuit board became poorer, with the result that the resistor was effectively in circuit all the time! This resulted in the failure of the armature to "pull in" when required, and the occasional fly-away!
Also, later versions had solder tags riveted to the PCB, to make connections easier. Unfortunately, with time, these rivets came loose, leading to another point of failure.
Fortunately the solution to these issues is simple. Modern systems tend to use "AAA" Eneloops, or even small LiPos for power, so current consumption is no longer an issue. This means we can eliminate the power saving resistor. We can also solder the rivets to the board (if the escapement has them, early ones did not), eliminating another issue.
Here's how:
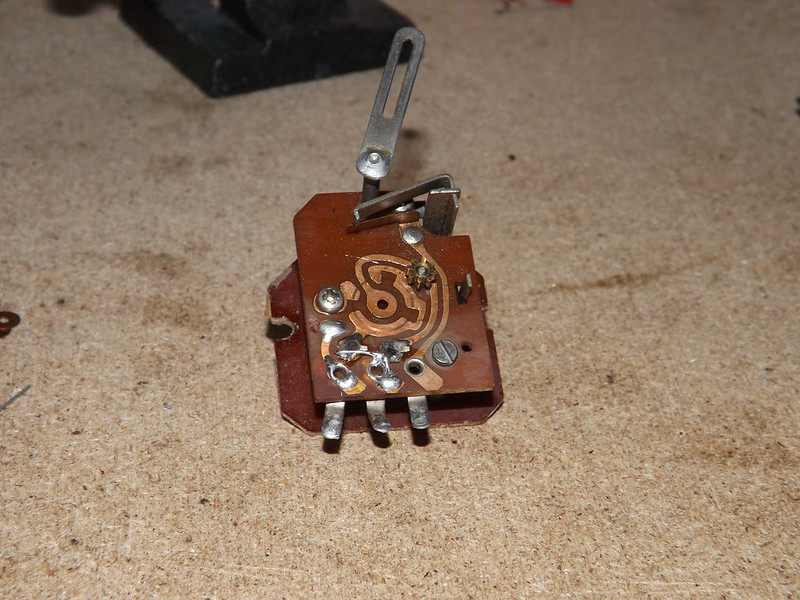
 Compact_1 by Peter Christy, on Flickr
First remove the plastic rotor by simply unscrewing it from the "hook". Watch out for the washer between the rotor and the PCB.
 Compact_2 by Peter Christy, on Flickr
Next, solder the rivets to the PCB (the third tag is for the "quick-blip" function):
 Compact_3 by Peter Christy, on Flickr
Finally solder a bridge across the resistor, shorting it out:
 Compact_4 by Peter Christy, on Flickr
Re-assemble the rotor onto the "hook" shaft - not forgetting the washer!
You will now have a much more reliable Compact escapement!
Have fun!
--
Pete