Gents,
After a long hiatus, I've decided to pursue the effort to make a single stick Tx. A few years back, I acquired the Quanum 3 axis gimbal, plan to use Phil's 7 channel encoder. As this has 3.3v hall effect sensors, I'll have to do some research on how to work on this.
Will post progress / challenges.
Regards
Marcus
Custom Single Stick TX
-
_shadow_
- Posts: 10
- Joined: 15 Jul 2021, 16:23
Custom Single Stick TX
- Attachments
-
Last edited by _shadow_ on 24 Jul 2021, 13:59, edited 1 time in total.
-
Mike_K
- Posts: 768
- Joined: 16 Feb 2018, 06:35
- Location: Hertfordshire
Re: Custom Single Stick
Hi Marcus
I don't think it'll be too hard to get working. Assuming you use a DM More Strong Pro Mini, it doesn't have onboard 3.3V, so you'll need a separate 3.3V regulator, something like this:
https://www.ebay.co.uk/itm/294195441329 ... SwwN5grmXK
The output of the joystick can be connected straight into the Arduino ADC (A0 - A2) and it will calibrate normally as its maximum output will be 3.3V and the Arduino is OK up to 5V.
Your biggest challenge is that it doesn't have any mechanical trims (it's designed to be used with transmitters with switched trims) and Phil's encoder isn't designed for switched trims. If the joystick had pot's you could just mount three separate pot's and wire them like this for trims:
viewtopic.php?f=9&t=135
But those circuits wouldn't work with hall sensors, so you'll have to figure something else out for the trims. If you didn't want auxiliary channels or rates/expo you could use three trim pots and re-program the Arduino sketch to use them for the aileron, elevator and rudder, but that would require Phil's sketch to be modified which may not be straightforward for you if you don't want to re-program the Arduino.
I look forward to seeing what you come up with!
Cheers
Mike
-
Martin
- Posts: 782
- Joined: 16 Feb 2018, 14:11
- Location: Warwickshire
Re: Custom Single Stick
A possible solution to the lack of trims, which I used on one of my transmitters is described below - it does require one or two digital inputs, and modifying the sketch to use them, and use the chip's Eeprom to store the trim offsets.
One input is used as a 'trim to current' button/switch. You hold the stick(s) so the plane is flying straight and level, and briefly activate the input - the current servo positions are remembered as the new centre-stick positions - this is useful for quick-but-rough trimming if the trim is way out.
The second input is the more useful one, and if you only have one input available, this would be the one to use: while you hold down the button, the stick becomes a trim adjuster - you usually move just one control at a time, say elevator, and when the stick is moved more than 25% away from centre, it's like holding down a digital trim button on a modern transmitter - the trim is gradually adjusted in the desired direction.
To implement the function, the sketch needs to store the A/D readings for each channel with the stick(s) at centre, and the current trim offsets.
I didn't include motor/throttle in my digital trimming functions, because there isn't really a centre position for the throttle stick. With electric planes you don't need throttle trim anyway, but for I.C. planes it's useful to adjust the idle speed. With a single stick set, you'll be using a separate pot for throttle anyhow, so you could implement a mechanical trim, or a separate trim pot for that channel, in the usual way.
-
_shadow_
- Posts: 10
- Joined: 15 Jul 2021, 16:23
Re: Custom Single Stick TX
I like this method...
"The second input is the more useful one, and if you only have one input available, this would be the one to use: while you hold down the button, the stick becomes a trim adjuster - you usually move just one control at a time, say elevator, and when the stick is moved more than 25% away from centre, it's like holding down a digital trim button on a modern transmitter - the trim is gradually adjusted in the desired direction."
While trying to wrap my head around the 'trim' issue, I've started to 3D print the knob, thanks to Tobe for the stl files. Might just use this to move the project along, retro fit this to an exiting old gimbal with pots.
DM Strong Pro has a 3.3v version but runs a 1/2 the speed, employing this would mean too much changes to the code?
Regards
Marcus
- Attachments
-
-
_shadow_
- Posts: 10
- Joined: 15 Jul 2021, 16:23
Re: Custom Single Stick TX
Printed knob parts, pins, pot, hollow shaft...ready for assembly...spring next.
The 3D print could be better, eSun PLA+, another set is printing.
Regards
Marcus
The 3D print could be better, eSun PLA+, another set is printing.
Regards
Marcus
- Attachments
-
-
Tobe
- Posts: 712
- Joined: 16 Feb 2018, 06:19
- Location: Varberg or Stockholm, Sweden
Re: Custom Single Stick TX
Well done, as always there is a learning process but it looks to me like you are a fast learner.
Cheers Marcus
Tobe
Cheers Marcus
Tobe
Cheers,
Tobe
Tobe
-
_shadow_
- Posts: 10
- Joined: 15 Jul 2021, 16:23
Re: Custom Single Stick TX
Decided to build 2 of these...2nd set printed just slightly better.
Can someone share the measurement from the top of the Tx to the top of the knob, maybe from the Pro Line or Futaba SS?
Thanks.
Regards
Marcus
Can someone share the measurement from the top of the Tx to the top of the knob, maybe from the Pro Line or Futaba SS?
Thanks.
Regards
Marcus
- Attachments
-
-
Tobe
- Posts: 712
- Joined: 16 Feb 2018, 06:19
- Location: Varberg or Stockholm, Sweden
-
_shadow_
- Posts: 10
- Joined: 15 Jul 2021, 16:23
Re: Custom Single Stick TX
Tobe,
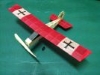
Thank you....that TX looks gorgeous in red! What are it’s dimensions, please?
Regards
Marcus
Thank you....that TX looks gorgeous in red! What are it’s dimensions, please?
Regards
Marcus
-
Tobe
- Posts: 712
- Joined: 16 Feb 2018, 06:19
- Location: Varberg or Stockholm, Sweden
Re: Custom Single Stick TX
180x160x55
It's a Micro Avionic converted to Spectrum DSM2 with one of Phil_G's earliest Arduino based Encoders....so it's close to an uppgrade
In the early days of chopper flying I used to fly single stick
It's a Micro Avionic converted to Spectrum DSM2 with one of Phil_G's earliest Arduino based Encoders....so it's close to an uppgrade
In the early days of chopper flying I used to fly single stick
- Attachments
-
Cheers,
Tobe
Tobe